方法1 直接在git后台设置xxx分支为保护分支就可以了,比如master
方法2,进入到项目文件夹
1 | cd .git/hooks/ |
在最前面加上代码,master可以替换对应分支
1 | #!/bin/sh |
1 | 首先在 GitHub 新建一个仓库(Repository),名称为 https://username}.github.io,注意这个名比较特殊, |
1 | npm install -g hexo-cli |
1 | hexo init {name} |
1 | npm install hexo-deployer-git --save |
1 | npm install hexo-image-link --save |
1 | title: 齐朝阳的博客 |
1 | git clone https://github.com/theme-next/hexo-theme-next themes/next |
1 | theme: next |
1 | scheme: Pisces |
1 | hexo new "Page Title" |
1 | hexo g |
1 | hexo s |
1 | hexo clean |
1 | deploy: |
1 | hexo deploy |
1 | 在根目录输入命令 hexo new page categories 会自动新建 categorier 文件夹并生成一个index.md文件,将里面的代码改为: |
1 | --- |
1 | --- |
1 | 在themes\next下的_config.yml中 |
1 | --- |
1 | --- |
1 | {% asset_img "png;base64,iVBORw0KGgoAAAANSUhEUgAAA..." "Alt text" %} |
1 | # 输入 |
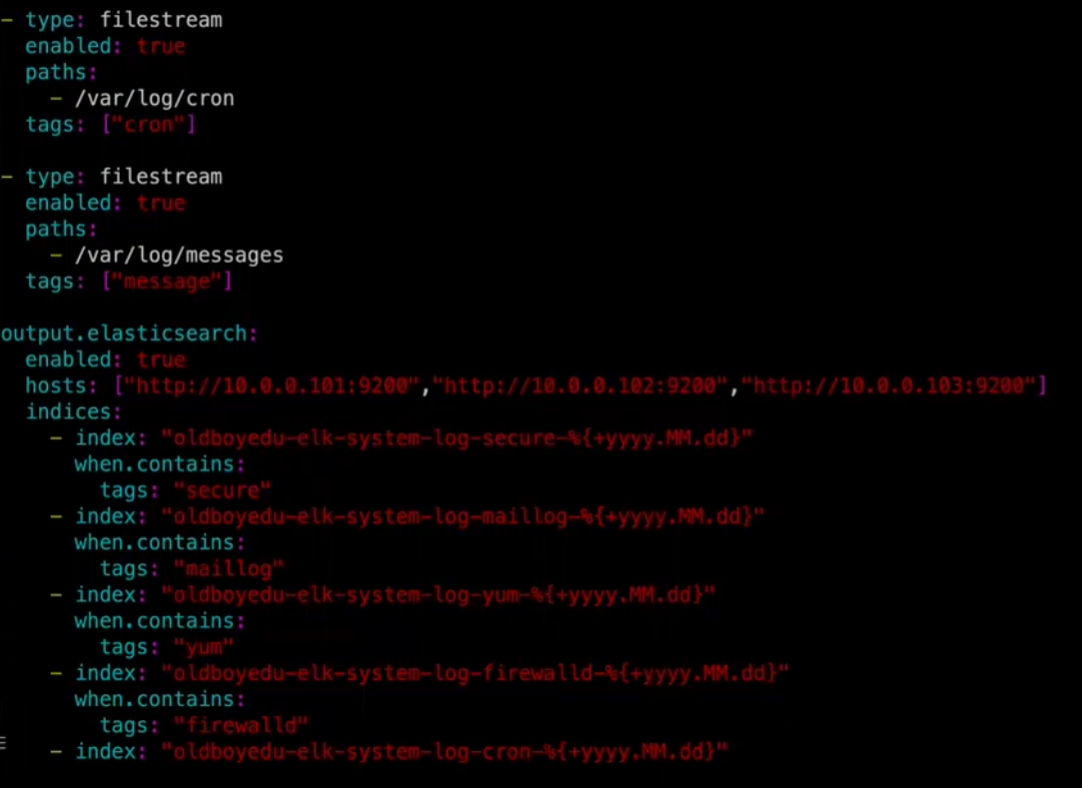
1 | input { |
1 | docker run --name elasticsearch -p 9200:9200 -p 9300:9300 -e "discovery.type=single-node" -e ES_JAVA_OPTS="-Xms512m -Xmx512m" -d elasticsearch:7.16.2 |
1 | docker run --name kibana -e ELASTICSEARCH_HOSTS=http://192.168.252.128:9200 -p 5601:5601 -d kibana:7.16.2 |
1 | docker exec -it kibana /bin/sh |
1 | server.name: kibana |
1 | docker run --name clickhouse-server --ulimit nofile=262144:262144 --volume=$HOME/clickhouse:/var/lib/clickhouse -p 8123:8123 -p 9000:9000 -p 9004:9004 clickhouse/clickhouse-server |
1 | sudo apt-key adv --keyserver hkp://keyserver.ubuntu.com:80 --recv 8919F6BD2B48D754 |
1 | echo "deb https://packages.clickhouse.com/deb stable main" | sudo tee /etc/apt/sources.list.d/clickhouse.list |
1 | sudo apt-get update |
1 | sudo apt-get install -y clickhouse-server clickhouse-client |
1 | sudo service clickhouse-server start |
1 | clickhouse-client |
1 | echo -n 密码 | openssl dgst -sha256 |
1 | <clickhouse> |
1 | clickhouse-client |
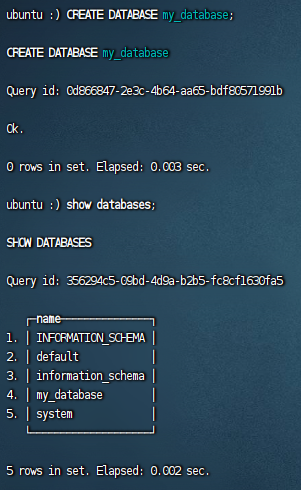
1 | CREATE DATABASE IF NOT EXISTS my_database; |
id UUID DEFAULT generateUUIDv4(),1 | CREATE TABLE my_database.my_table |
1 | INSERT INTO my_database.my_table (id, name, timestamp, value) VALUES (1, 'John Doe', '2021-01-01 00:00:00', 1.0); |
1 | SELECT * FROM my_database.my_table; |
1 | ALTER TABLE my_database.my_table UPDATE name = 'new_value' WHERE id = 2; |
1 | DELETE FROM my_database.my_table WHERE id = 1 |
1 | from clickhouse_driver import Client |
1 | php bin/hyperf.php gen:migration create_users_table |
1 | public function up(): void |
1 | php bin/hyperf.php migrate |
1 | php bin/hyperf.php migrate --seed |
1 | php bin/hyperf.php migrate --path=migrations/xx.php |
1 | php bin/hyperf.php gen:seeder UserSeeder |
1 | <?php |
1 | //全部填充 |